Drawing tools
The tool rail holds ten tools. This chapter describes all of them except Select, which has its own chapter: Selecting and transforming. The letter after each tool name is its keyboard shortcut.
When the active layer is locked or hidden, the drawing tools refuse to draw and show a short message: ‘The active layer is locked. Unlock it to draw.’ or ‘The active layer is hidden. Show it to draw.’ Unlock or show the layer in the layer panel.
Pen (P) and Pencil (N)
Pen and pencil draw freehand strokes. They differ only in their brushes: the pen starts with the ‘Variable Width’ preset, the pencil with ‘Soft’, a textured pencil brush. When you switch between the two, the brush, width and opacity of that tool’s default preset are applied.
The property panel shows:
- the brush (preset) name: tap it to choose another brush, see Brushes and colours;
- ‘Color’ with harmony suggestions and your palette;
- ‘Size’ from 1 to 50;
- ‘Opacity’ from 5% to 100%.
With a stylus, line width follows your pressure. With a finger or mouse, most brushes simulate pressure from your drawing speed. You can adjust how pressure is translated in the brush settings and with a global pressure curve in the settings.
If a grid with snapping is active, a stroke that starts near a grid line follows it. If guides are on and ‘Snap to guides’ is active, a stroke that starts close to a guide follows the guide for its whole length. See Grids, guides and backgrounds.
Eraser (E)
The eraser removes whole strokes. Touch a stroke or swipe across several, and they disappear as you go; one swipe is one undo step. It works on all visible, unlocked layers, not only the active one, and skips strokes that are locked. There are no options to set.
To remove only part of a stroke, cut it first with the Slice tool, or edit its points with the Points tool.
Shape (S)
The Shape tool draws lines, rectangles, ellipses, polygons and freeform outlines. Choose the shape type at the top of the property panel.
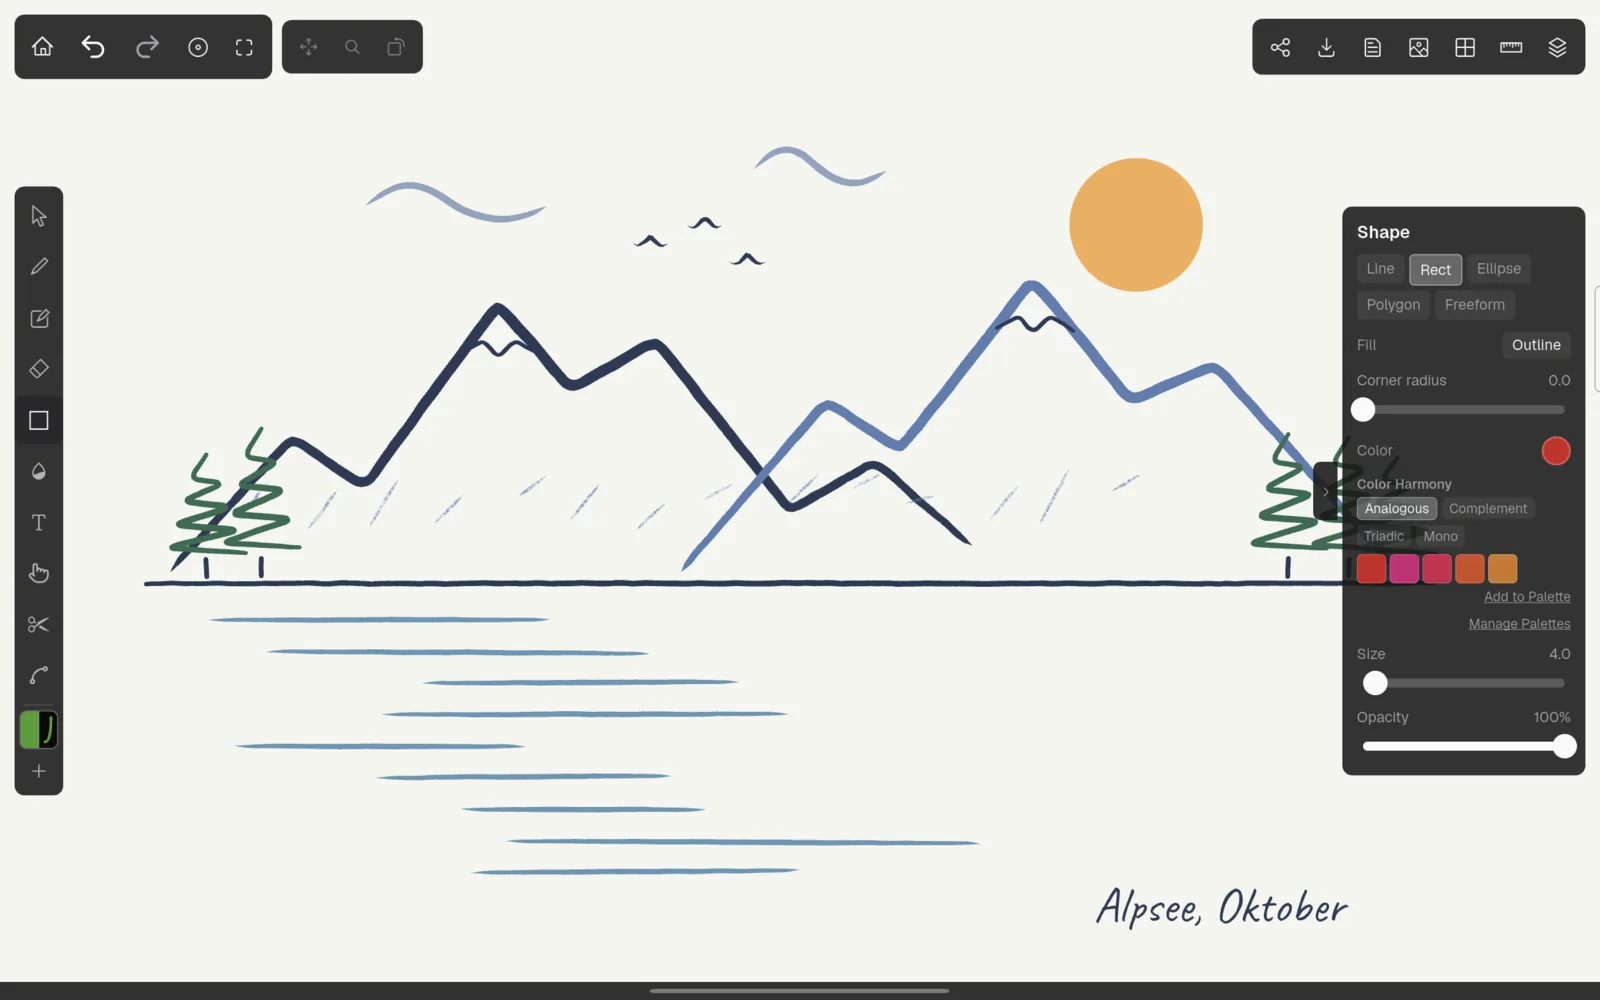
For a line, rectangle, ellipse or polygon, press where the shape should start and drag to the opposite corner. Further options:
- ‘Fill’ switches between ‘Outline’ and ‘Filled’.
- ‘Corner radius’ (0 to 100) rounds the corners of rectangles.
- ‘Sides’ (3 to 12) sets the number of corners of a polygon.
A freeform shape is built point by point: tap to place each corner. Tap the first point again to close the shape (it needs at least three points). While you are building a freeform shape, the panel shows ‘Done’, which keeps it as an open line, and ‘Cancel’, which discards it. Switching to another tool also keeps the shape as an open line.
With ‘Show measurements’ switched on in the grid settings, the width and height of the shape are displayed while you drag. Start and end points snap to grid intersections and guides in the same way as pen strokes.
Eyedropper (I)
Tap any stroke to take over its colour. Kritzel Studio then switches back to the tool you used before, with the new colour. Only visible, unlocked layers are sampled.
Text (T)
Tap the canvas where the text should start. The ‘Add Text’ dialog opens:
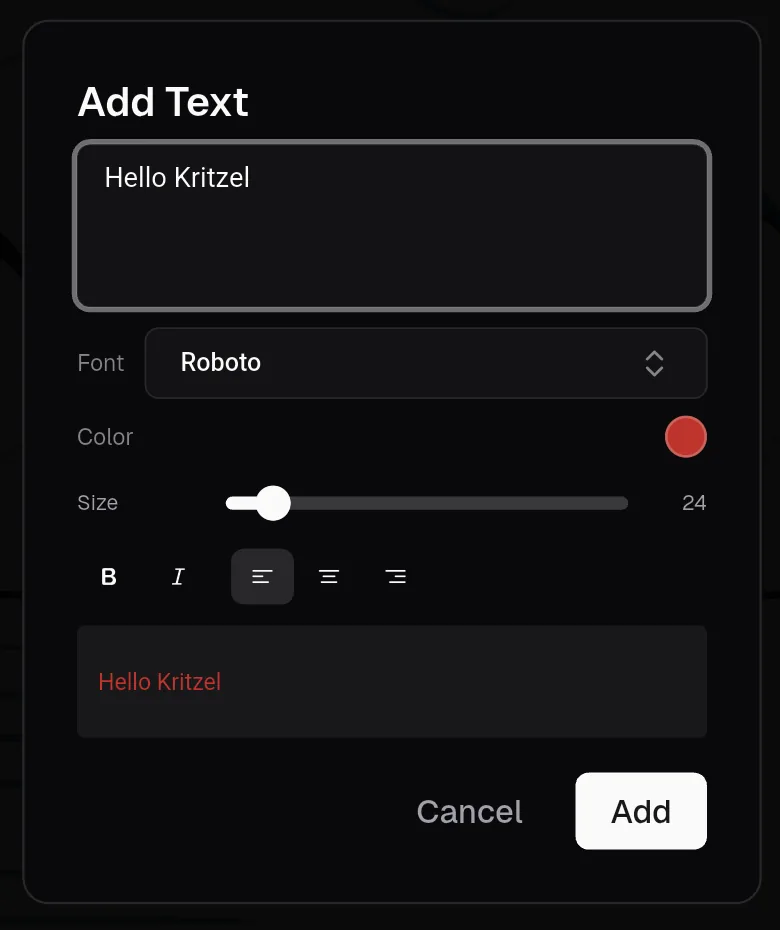
- Type your text. Line breaks are allowed.
- ‘Font’: Roboto, Open Sans, Montserrat, Lora, Source Code Pro, Caveat, Pacifico or Permanent Marker.
- ‘Color’ and ‘Size’ (8 to 144).
- Bold, italic and alignment (left, centred, right).
Tap ‘Add’ to place the text. To edit an existing text later, switch to the Select tool and double-tap the text, or select it and tap ‘Edit text…’ in the property panel. Tapping a text with the Text tool creates a new text instead.
Text can be moved, scaled and rotated like any other object.
Nudge (U)
Nudge pushes the points of strokes around, as if you were pushing them with your finger. A circle shows the area of influence. Drag across a stroke: points near the centre of the circle move the most.
‘Radius’ (10 to 200, in screen pixels) sets the size of the circle and ‘Strength’ (10% to 100%) how far the points move. Nudge only affects the active layer and leaves text, images and locked strokes alone.
Slice (K)
Slice cuts strokes. Draw a straight line across one or more strokes; when you lift your finger or stylus, every stroke the line crosses is split into separate pieces. You can then select, recolour or delete the pieces individually.
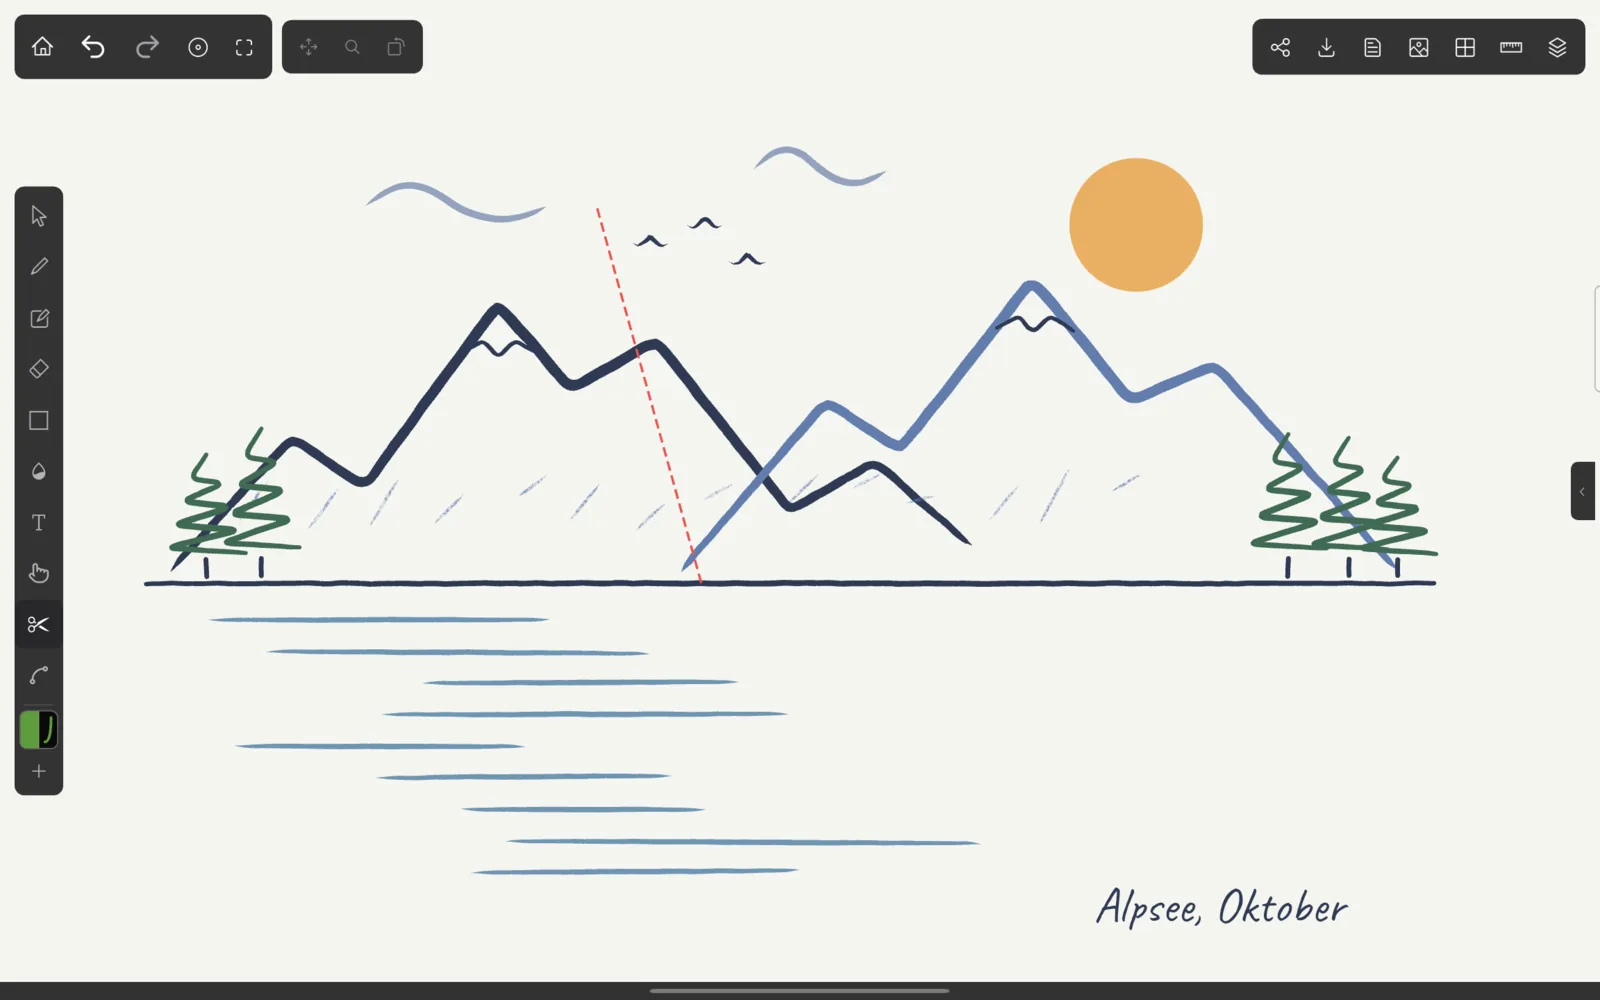
Slice works on all visible, unlocked layers. Text, images and locked strokes are not cut.
Points (A)
The Points tool edits the individual points of a stroke. Tap a stroke to select it; handles appear on its points.
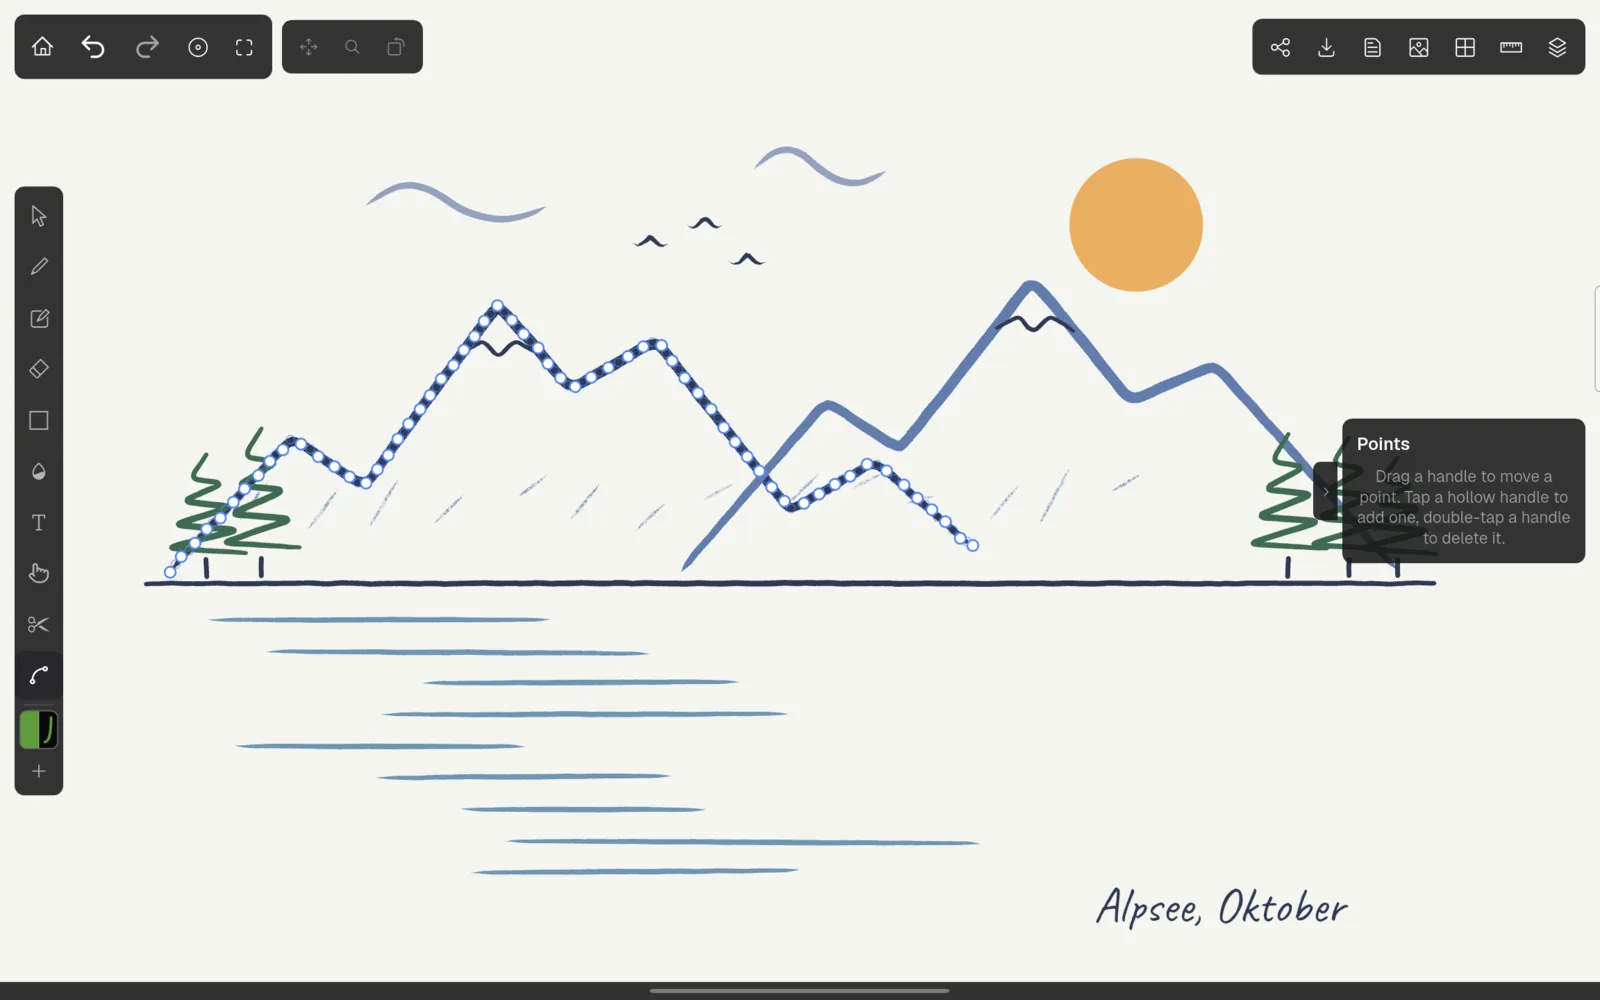
- Drag a solid handle to move that point.
- Drag across empty space to select several points with a rectangle, then drag one of them to move them all.
- Tap or drag a hollow handle between two points to insert a new point there.
- Double-tap a handle to delete the point, or select points and tap ‘Delete Points’ (or press Delete or Backspace).
A stroke needs at least two points. Text and images have no editable points.
Rectangles, ellipses, lines and polygons are defined by their corners rather than by points you can edit. Select one and tap ‘Convert to Freeform’ to turn it into a freeform shape with editable points. The shape looks exactly the same afterwards, but SVG export will then write it as a path rather than as a rectangle or ellipse element.