The canvas
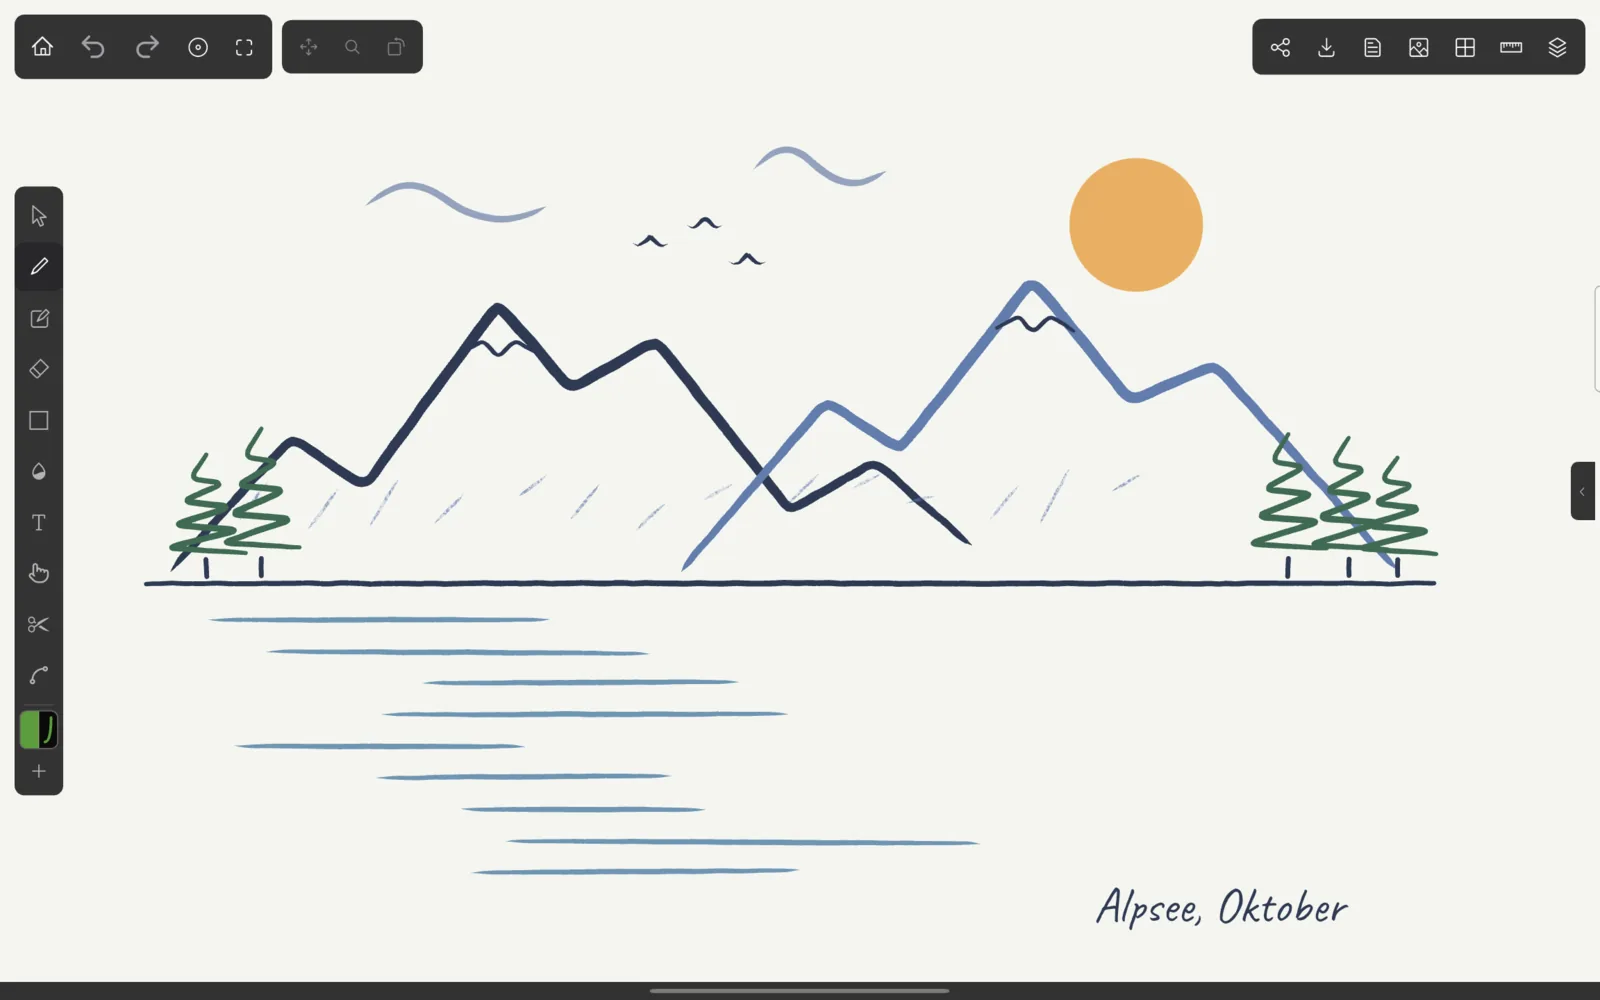
The canvas is where you draw. It is surrounded by a toolbar at the top, the tool rail at the side and the property panel, which shows the options of the current tool.
The toolbar
The toolbar consists of three groups. Every button shows its name when you hover over it with a mouse or long-press it.
The group at the top left contains the basics:
| Button | What it does |
|---|---|
| House | Saves the project and returns to the gallery. |
| Curved arrow left | ‘Undo’ |
| Curved arrow right | ‘Redo’ |
| Circle | ‘Zen mode’: hides everything except the drawing. |
| Corners | ‘Reset view’: resets zoom, pan and rotation. Long-press or right-click it to reset only one of them (‘Reset pan’, ‘Reset zoom’, ‘Reset rotation’). |
The second group holds three locks: ‘Lock pan’, ‘Lock zoom’ and ‘Lock rotation’. A locked button turns orange, and the corresponding part of every gesture is ignored. This is handy when you want to zoom without accidentally rotating the canvas. Locks are not saved; they are off whenever you open a project.
The group at the top right concerns the document:
| Button | What it does |
|---|---|
| Share icon | ‘Export’ the drawing as PNG, JPG, SVG, PDF or .kritzel. |
| Download icon | ‘Import’ an image or an SVG file into the drawing. |
| Page icon | ‘Vector Preview’: shows the drawing without brush textures, the way SVG and PDF export it. |
| Picture icon | ‘Background’: background colour and templates. |
| Grid icon | ‘Grid’: grid and perspective settings. |
| Ruler icon | ‘Guides’: ruler and ellipse guides. |
| Target icon | ‘Snap to guides’. Only shown while guides are switched on. |
| Stack icon | ‘Layers’: shows or hides the layer panel. |
When a panel is open, its button is dimmed. In a narrow window (less than 700 pixels wide) only the house, undo and redo buttons stay in the toolbar; everything else moves into the ‘More’ menu behind the three dots.
The tool rail
The tool rail holds the ten tools, from top to bottom: Select, Pen, Pencil, Eraser, Shape, Eyedropper, Text, Nudge, Slice and Points. The Shape button shows the current shape type. With a keyboard, each tool has a single-key shortcut, listed in Shortcuts and gestures.
Below the tools are your favourite pens and a plus button to save the current pen as a favourite; see Favourite pens.
If you prefer to see the tool names, switch on ‘Show tool labels’ in the settings. ‘Toolbar density’ makes the buttons larger, and ‘Handedness’ moves the rail to the right side for left-handed users (the panels then move to the left).
The property panel
The property panel shows the options of the active tool, or of the selected objects when you use the Select tool. On a desktop it is always docked at the side. On a tablet it is hidden at first: tap the small tab at the edge of the screen to show it, and tap the tab again to hide it.
In a narrow window, the property panel, the layer panel and the grid, background and guide settings open as sheets from the bottom of the screen.
Many panel values are sliders. Tap the number next to a slider to type an exact value, confirm it with Enter or cancel with Esc.
Zen mode
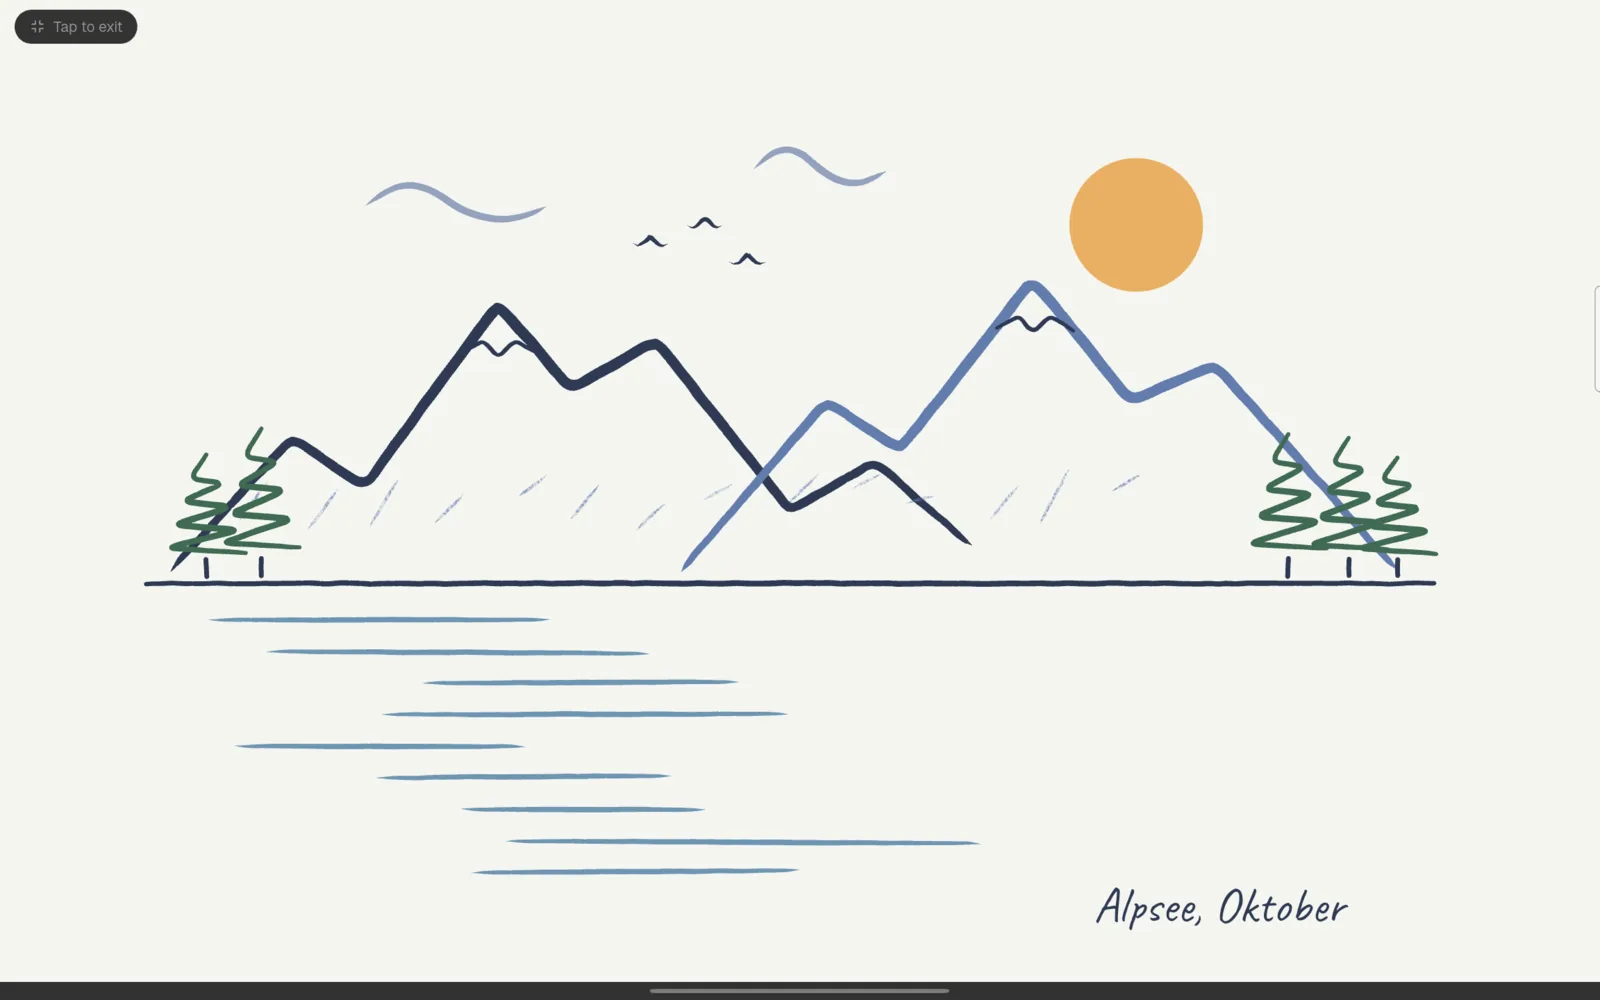
Zen mode hides the toolbar, the tool rail and all panels so that only the drawing remains. Turn it on with the circle button or with Esc. A small ‘Tap to exit’ label appears at the top left and fades after a few seconds into an almost invisible icon in the same place. Tap it, or press Esc, to bring everything back.
Moving around
On a touch screen, use two fingers: move them to pan, pinch to zoom, turn them to rotate the canvas. All three work at the same time unless you lock one of them. If a drawing gesture was in progress when the second finger touched down, it is cancelled.
With a mouse, the scroll wheel zooms around the pointer and dragging with the middle mouse button pans. On a Mac trackpad, pinch to zoom, swipe with two fingers to pan and turn two fingers to rotate. On the keyboard, Ctrl+= and Ctrl+- zoom in and out, Ctrl+0 resets the view.
The zoom range is 5% to 5000%. Each project remembers its last view.
What a single finger does is up to you: by default it draws with the active tool, but you can set it to pan, to erase or to always use one particular tool. See ‘Finger behavior’ in the settings. A stylus and a mouse always use the active tool.
Undo and redo
Almost everything you do on the canvas can be undone: strokes, deletions, transformations, layer changes, grid, guide and background changes. Changes to the view (zoom, pan, rotation) are not part of the history. A slider drag counts as one step.
Undo and redo with the arrows in the toolbar, with Ctrl+Z and Ctrl+Shift+Z, or with gestures: by default a two-finger tap undoes and a three-finger tap redoes. Kritzel Studio keeps the last 100 steps. If the device runs very low on memory, the history is shortened to the last 20 steps.
Saving
Kritzel Studio saves automatically, about five seconds after your last change and in any case every 20 seconds while there are unsaved changes. It never saves in the middle of a stroke. It also saves completely, including the thumbnail and the current view, when the app goes to the background, when you press Ctrl+S and when you return to the gallery.
If a save fails, for example because the device is full, a message appears: ‘Couldn’t save your drawing’. When you then try to leave the project, Kritzel Studio asks whether you want to stay (‘Cancel’) or leave anyway, which would lose the unsaved changes.